Introduction
This document explains how to install the SAML2 library and configure it to work with the PureAUTH Identity Platform and make DotNet Web Forms Passwordless.
Requirements
ASP.NET Web forms application / ASP.NET web API (.Net framework 4.0+)
Prerequisite
- SAML2 Library – Author : Michael Hallock
NuGet package installation
- Install the SAML2 Library from Project > Manage NuGet Packages > SAML2 by Michael Hallock
Add DotNet Web Forms SAML application on PureAUTH
- Login to https://live.pureauth.io/organizations/login/
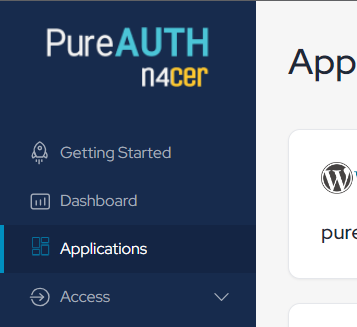
- Navigate to the Applications tab.
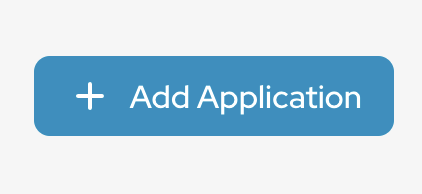
- Select “Add Application”.
- Select “Custom App”.
- Enter Any application Name.
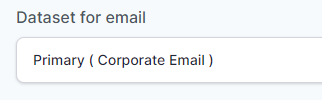
- Select Primary (Corporate Email) in the Dataset for email field.
Instead of localhost, you can use your “https://<domain with port>/Login.ashx“
- In the “SAML Response Endpoint (ACS URL)” field, enter the URL using the following pattern.
https://<domain with port>/Login.ashx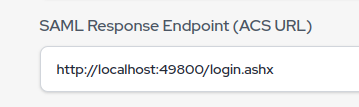
- In “Audience (Entity ID)” field, enter the URL using the following pattern:
https://<domain with port>/Login.ashx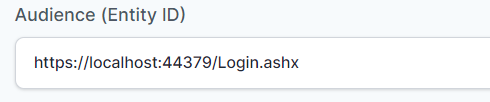
- In “SAML Logout Response Endpoint (SLO URL)” field enter the URL using the following pattern:
https://<domain with port>/Login.ashx
Sign Assertion : checked

Library Configuration
- Edit your Web.config.
- Inside <configuration> Section add below SAML.
<configSections>

<section name="saml2" type="SAML2.Config.Saml2Section, SAML2"/>

</configSections>
- Inside <system.webServer> Section add below Handlers and Modules.
<handlers>

<remove name="SAML2.Protocol.Saml20SignonHandler" />
<remove name="SAML2.Protocol.Saml20LogoutHandler" />
<remove name="SAML2.Protocol.Saml20MetadataHandler" />
<add name="SAML2.Protocol.Saml20SignonHandler" verb="*" path="Login.ashx" type="SAML2.Protocol.Saml20SignonHandler, SAML2" />
<add name="SAML2.Protocol.Saml20LogoutHandler" verb="*" path="Logout.ashx" type="SAML2.Protocol.Saml20LogoutHandler, SAML2" />
<add name="SAML2.Protocol.Saml20MetadataHandler" verb="*" path="Metadata.ashx" type="SAML2.Protocol.Saml20MetadataHandler, SAML2" />

</handlers>
<modules>

<remove name="Saml20MetadataFetcher" />
<add name="Saml20MetadataFetcher" type="SAML2.Saml20MetadataFetcherModule" preCondition="managedHandler" />

</modules>
- Inside <configuration> and below </system.webServer> add below SAML.
<saml2>
<allowedAudienceUris>
<audience uri="https://localhost:44333/Login.ashx" />
</allowedAudienceUris>
<serviceProvider id="https://localhost:44333/" server="https://localhost:44333/">
<signingCertificate findValue="CN=localhost" storeLocation="LocalMachine" storeName="My" x509FindType="FindBySubjectDistinguishedName" />
<endpoints>
<endpoint type="SignOn" localPath="Login.ashx" redirectUrl="~/Account/Session.aspx" binding="Post" />
<endpoint type="Logout" localPath="Logout.ashx" redirectUrl="~/Help" />
<endpoint type="Metadata" localPath="Metadata.ashx" />
</endpoints>
<authenticationContexts comparison="Exact">
<add context="urn:oasis:names:tc:SAML:2.0:ac:classes:PasswordProtectedTransport" referenceType="AuthnContextClassRef" />
</authenticationContexts>
</serviceProvider>
<identityProviders metadata="C:\Users\ABC\Desktop\MetaPureAuth">
<add id="https://live.pureauth.io/auth/custom-app-saml/45177dcfc3/fb0593a3-ad58-4d34-beaa-b356c5097492" default="true" omitAssertionSignatureCheck="false">
<certificateValidations>
<add type="SAML2.Specification.SelfIssuedCertificateSpecification, SAML2" />
</certificateValidations>
</add>
</identityProviders>
<actions>
<clear />
<action name="SetSamlPrincipal" type="SAML2.Actions.SamlPrincipalAction, SAML2" />
<action name="Redirect" type="SAML2.Actions.RedirectAction, SAML2" />
</actions>
</saml2>- The field highlighted in Red will be the ACS url to be configured in the PureAuth Portal.
- The fields highlighted in Blue must be changed according to the changes in the audience url (highlighted RED).
- The field highlighted in yellow should be the Saml Login URL obtained from PureAuth Portal.
- The field highlighted in green points to a directory that contains the metadata downloaded/generated from the IDP.
- Generate the metadata by the following steps:
- Go to https://www.samltool.com/idp_metadata.php
- Copy the entity ID from PureAUTH and paste it in the EntityID field.
- Copy the SAML Login URL from PureAUTH and paste it in the Single Sign On Service Endpoint (HTTP-REDIRECT) Field.
- Copy the X509 certificate from PureAUTH and paste it in the SP X.509 cert field.
- Select NameId Format to be emailAddress.
- Scroll down and click “Build IDP metadata“.
- Copy the generated IDP metadata and paste it in Notepad.
- Save it as an .XML file at location given in “Web.config” file.
- Generate the metadata by the following steps:
- The field highlighted in purple should have the path to the following page.
- Create a web forms page in your scope. (Example: “Session.aspx“)
- On this page you will be handling Session, to maintain the email address of user in your application.
- An example, on how to retrive the value of email id is given below. In the variable “Identity“,we have the user’s email address.
   //Fetching the Identity
            var context = HttpContext.Current;
            try
            {
                string identity;
                foreach (DictionaryEntry cache in context.Cache)
                {
                    string key = (string)cache.Key;
                    string value = (string)cache.Value;
                    if (key.EndsWith("IDPNameId"))
                    {
                        identity = value;
                        Response.Redirect("Register.aspx");
                    }
                }
            }
            catch (Exception _)
            {

            }
You can change the code structure to meet your requirements.
- Store the email address in a session, or use as per your application requirement.
Verify SAML Authentication
- Visit the Login.ashx endpoint.
- You will be redirected to PureAuth.
- Open the AuthVR5 app and scan the QR code using Swift Login.