Introduction
This document explains how to integrate the Spring-Boot Framework and configure it to work with the PureAUTH Identity Platform to make Java application passwordless.
Add Java SAML application on PureAUTH
- Login to https://live.pureauth.io/organizations/login/
- Navigate to the Applications tab.
- Select “Add Application”.
- Select “Custom App”.
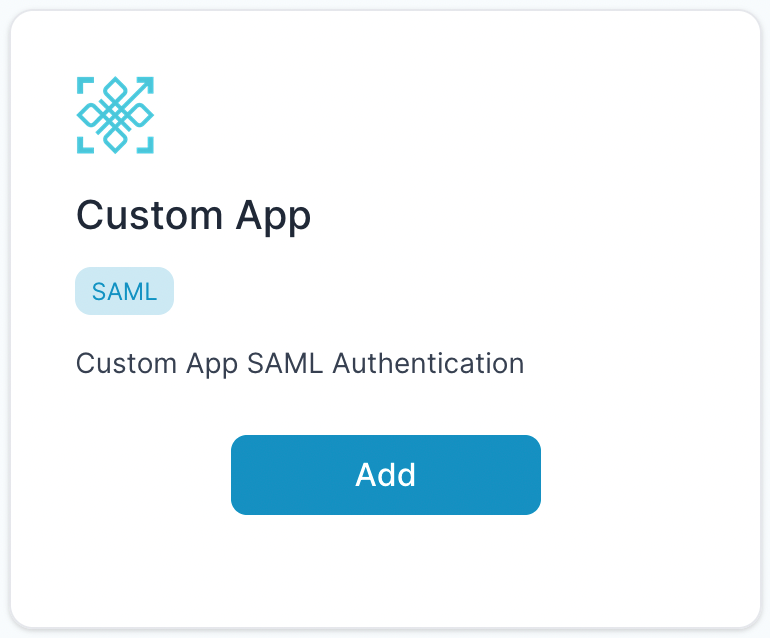
- Enter Any application Name.
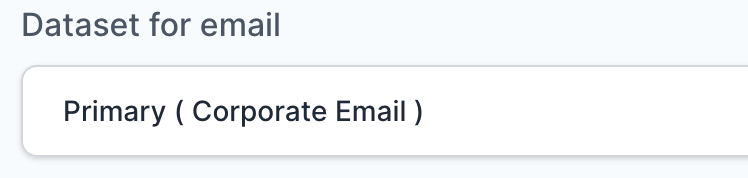
- Select Primary (Corporate Email) in the Dataset for email field.
- In the “SAML Response Endpoint (ACS URL)” field, enter the URL using the following pattern.
https://<domain with port>/login/saml2/sso/<registrationID>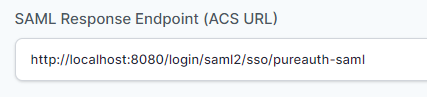
In this example, registrationID is taken as “pureauth-saml”, you may choose any registrationID.
- In “Audience (Entity ID)” field, enter the URL using the following pattern:
https://<domain with port>/saml2/service-provider-metadata/<registrationID>
- In “SAML Logout Response Endpoint (SLO URL)” field enter the URL using the following pattern:
https://<domain with port>/saml2/service-provider-metadata/<registrationID>
- Sign Assertion : checked

Add SAML Authentication
Create a Java file named SecurityConfiguration.java in the same folder as your Java application file.
package com.example.springsaml;

import java.io.File;
import java.security.cert.X509Certificate;

import javax.servlet.http.HttpServletRequest;

import org.opensaml.security.x509.X509Support;
import org.springframework.beans.factory.annotation.Autowired;
import org.springframework.context.annotation.Bean;
import org.springframework.context.annotation.Configuration;
import org.springframework.core.convert.converter.Converter;
import org.springframework.security.config.annotation.web.builders.HttpSecurity;
import org.springframework.security.config.annotation.web.configuration.EnableWebSecurity;
import org.springframework.security.config.annotation.web.configuration.WebSecurityConfigurerAdapter;
import org.springframework.security.saml2.core.Saml2X509Credential;
import org.springframework.security.saml2.provider.service.metadata.OpenSamlMetadataResolver;
import org.springframework.security.saml2.provider.service.registration.InMemoryRelyingPartyRegistrationRepository;
import org.springframework.security.saml2.provider.service.registration.RelyingPartyRegistration;
import org.springframework.security.saml2.provider.service.registration.RelyingPartyRegistrationRepository;
import org.springframework.security.saml2.provider.service.servlet.filter.Saml2WebSsoAuthenticationFilter;
import org.springframework.security.saml2.provider.service.web.DefaultRelyingPartyRegistrationResolver;
import org.springframework.security.saml2.provider.service.web.Saml2MetadataFilter;

@Configuration
@EnableWebSecurity
public class SecurityConfiguration extends WebSecurityConfigurerAdapter {

	@Autowired
	private RelyingPartyRegistrationRepository relyingPartyRegistrationRepository;

	@Override
	protected void configure(HttpSecurity http) throws Exception {
		http
	    	.authorizeRequests(authorize ->
	    		authorize.antMatchers("/").permitAll().anyRequest().authenticated()
	        ).saml2Login();

		// add auto-generation of ServiceProvider Metadata
		Converter<HttpServletRequest, RelyingPartyRegistration> relyingPartyRegistrationResolver = new DefaultRelyingPartyRegistrationResolver(relyingPartyRegistrationRepository);
		Saml2MetadataFilter filter = new Saml2MetadataFilter(relyingPartyRegistrationResolver, new OpenSamlMetadataResolver());
		http.addFilterBefore(filter, Saml2WebSsoAuthenticationFilter.class);
	}

	@Bean
	protected RelyingPartyRegistrationRepository relyingPartyRegistrations() throws Exception {
		ClassLoader classLoader = getClass().getClassLoader();
		File verificationKey = new File(classLoader.getResource("certificates/pureauth.crt").getFile());
	    X509Certificate certificate = X509Support.decodeCertificate(verificationKey);
	    Saml2X509Credential credential = Saml2X509Credential.verification(certificate);
	    RelyingPartyRegistration registration = RelyingPartyRegistration
	            .withRegistrationId("pureauth-saml")
	            .assertingPartyDetails(party -> party
	                .entityId("https://live.pureauth.io/auth/custom-app-saml/45177dcfc3/e1c200b1-6db6-4493-bcf6-729f0b04b81c")
	                .singleSignOnServiceLocation("https://live.pureauth.io/auth/custom-app-saml/45177dcfc3/e1c200b1-6db6-4493-bcf6-729f0b04b81c")
	                .wantAuthnRequestsSigned(false)
	                .verificationX509Credentials(c -> c.add(credential))
	            ).build();
	    return new InMemoryRelyingPartyRegistrationRepository(registration);
	}

}
- The field highlighted in Red will be the X509Certificate to be configured in the PureAuth Portal.
- Copy X509Certificate from PureAUTH Portal and paste it in a file named “pureauth.crt”.
- Save this file on the following location: src > main > resources > certificates > pureauth.crt
- The field highlighted in Orange will be Registration ID (Use the same registrationID used while adding the application on PureAuth).
- The field highlighted in Yellow will be the ACS URL to be configured in the PureAuth Portal.
- The field highlighted in Green will be Single Sign-On Service Location. Copy this from the PureAUTH portal (Entity ID field) and paste it in Single Sign-On Service Location.
Please refer to the following java application file SringsamlApplication.java
package com.example.springsaml;

import org.springframework.boot.SpringApplication;
import org.springframework.boot.autoconfigure.SpringBootApplication;
import org.springframework.security.core.annotation.AuthenticationPrincipal;
import org.springframework.security.saml2.provider.service.authentication.Saml2AuthenticatedPrincipal;
import org.springframework.stereotype.Controller;
import org.springframework.ui.Model;
import org.springframework.web.bind.annotation.RequestMapping;


@SpringBootApplication
@Controller
public class SpringsamlApplication {

	public static void main(String[] args) {
		SpringApplication.run(SpringsamlApplication.class, args);
	}

	@RequestMapping("/")
	public String index() {
		return "index";
	}

	@RequestMapping("/secured/hello")
	public String hello(@AuthenticationPrincipal Saml2AuthenticatedPrincipal principal, Model model) {
		model.addAttribute("name", principal.getName());
		return "hello";
	}


}
Please make sure the application has the following dependencies in the pom.xml file
<project xmlns="http://maven.apache.org/POM/4.0.0"
	xmlns:xsi="http://www.w3.org/2001/XMLSchema-instance"
	xsi:schemaLocation="http://maven.apache.org/POM/4.0.0 https://maven.apache.org/xsd/maven-4.0.0.xsd">
	<modelVersion>4.0.0</modelVersion>
	<groupId>it.andreascanzani.example</groupId>
	<artifactId>spring-boot-saml2</artifactId>
	<version>0.0.1</version>

	<parent>
		<groupId>org.springframework.boot</groupId>
		<artifactId>spring-boot-starter-parent</artifactId>
		<version>2.4.2</version>
		<relativePath /> <!-- lookup parent from repository -->
	</parent>

	<properties>
		<java.version>1.8</java.version>
	</properties>

	<dependencies>
		<dependency>
			<groupId>org.springframework.boot</groupId>
			<artifactId>spring-boot-starter-web</artifactId>
		</dependency>
		<dependency>
			<groupId>org.springframework.boot</groupId>
			<artifactId>spring-boot-starter-thymeleaf</artifactId>
		</dependency>
		<dependency>
			<groupId>org.springframework.boot</groupId>
			<artifactId>spring-boot-starter-security</artifactId>
		</dependency>
		<!-- dependency for saml2 -->
		<dependency>
			<groupId>org.springframework.security</groupId>
			<artifactId>spring-security-saml2-service-provider</artifactId>
		</dependency>
		<dependency>
			<groupId>org.springframework.boot</groupId>
			<artifactId>spring-boot-starter-test</artifactId>
			<scope>test</scope>
		</dependency>
		<dependency>
			<groupId>org.springframework.security</groupId>
			<artifactId>spring-security-test</artifactId>
			<scope>test</scope>
		</dependency>
	</dependencies>


	<build>
		<plugins>
			<plugin>
				<groupId>org.springframework.boot</groupId>
				<artifactId>spring-boot-maven-plugin</artifactId>
			</plugin>
		</plugins>
	</build>

</project>
Verify SAML Authentication
- Go to cmd (Command Prompt) and run : mvn spring-boot:run
- Visit your https://<domain with port or localhost with port >
- Open the AuthVR5 app and scan the QR code using Swift Login.
- Congratulations! You are now using Java Application passwordless.
Further Assistance
For further information or assistance, please contact PureID support team : support@pureid.io.