Introduction to PureSync
This document explains how to use the PureSync tool for User On-boarding. PureSync plays a vital role to continuously synchronize user’s signature with the PureAUTH platform. PureSync module is designed to extract user information from various data sources like Active Directory, CSV etc. The information extracted from the above source is then digitally signed with the organization’s private key and only these digital signatures are synchronized with the PureAUTH platform.
Prerequisites
To follow this document, you need the following prerequisites.
- You need access of your Organization in PureAuth portal. ref: Organization On-boarding
- You need the following user details in a data source such as:- CSV, Azure AD or Active Directory.
- Corporate Email (Acts as the user identifier and must be unique)
- Phone Number (An OTP will be sent to this number during profile registration process)
- Full Name
- Primary Email (An OTP will be sent to this email during profile registration. Recommended to be user’s personal email. You can copy the Corporate email in this field if you do not have the personal emails of users)
Installation of PureSync
- To download the PureSync Installer file visit the following link: PureSYNC.
- Double Click on the downloaded .msi file to install PureSYNC on your system.
Getting Started with PureSync
- Create a folder for PureSYNC where the public/private keys and the CSV files will be stored.
- Open an Administrator command prompt (Important).
- Use the “cd” command to change directory to the folder created in step 1.
Configure PureSYNC
Run the following command to configure PureSYNC:
puresync initPureSYNC will ask the administrator for the following parameters
Organization ID:The organization is the “Organization Domain / ID” set during the organization on-boarding process. You can also find this ID by logging to the N4cer Portal and going to Settings Tab and referring to the ID under Organization Profile card. For example, Organization ID for admin user test@neoagri.tech is neoagri.tech.
Access Token:The Access token can be generated by logging in to the N4cer portal and going to the Settings>Access Tokens Page.
Do you want to Generate Public/Private Key Pair ? [Y/n]If you are running the “puresync init” command for the first time, enter ‘Y’.
Conversly, if you have already run the init command before and generated the key-pair and uploaded to the PureAUTH platform (You can check if the public key is uploaded to the PureAUTH platform here), please enter ‘n’. Provide the Full path of the key-pair as per the prompts.
Provide the path of private key:
Provide the path of public key:
Do you want to upload the public key ? [Y/n] :Enter ‘Y’ if you have just generated the public/private key-pair in the step above. If you have already uploaded the public key before, enter ‘n’.
Warning: If you have generated the Public/Private key-pair, they will be present in the current directory of the command prompt. Please take a backup of the key-pair. We recommend backing them up to an offline storage which is separate from the current machine to avoid losing them in case of storage failure. (E.g. A flash drive).
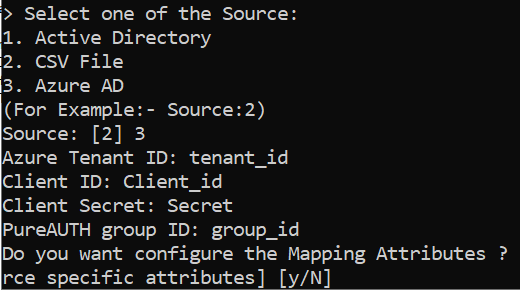
Select one of the Sources Below:
1) Active Directory
2) CSV
3) Azure AD
Select one of the sources. Once the source is selected, PureSYNC will ask some information to connect to it.
Warning: Please run PureSYNC as an administrator on first launch. Please use puresync init command only once (On first launch only). If you need to re-use the puresync init command (In case of error due to not having Admin privileges),
1) Take a backup of the public and private keys that are generated in the current folder of the cmd.
2) Do not respond (Yes) to “Generate Public/Private key-pair” prompt. (If selected “Yes” previously)
3) Do not respond (Yes) to “Upload public key to PureAUTH platform” prompt. (If selected “Yes” previously)
Responding “Yes” to these prompts may overwrite your key-pair. Losing the Private key will result in not being able to add or update users on the PureAUTH platform.
In case you have lost your Private key, (Corresponding to the key uploaded to the PureAUTH platform), Please contact the PureID team.
Active Directory
Provide LDAP Path Domain (Example: pureauth.tech)
Enter your active directory Domain. In case of the below example, it is pureauth.local.

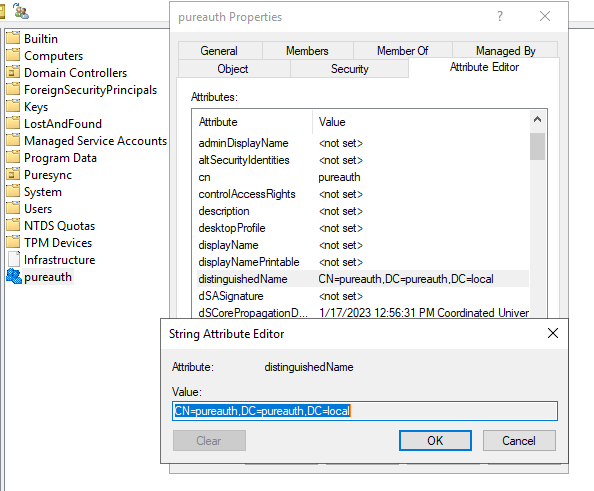
Provide Distinguished Name (DN) of Group or Organization Unit(OU)
- Create a Security group in AD for PureAUTH users.
- The users in this group will be visible to the puresync tool.
- Right click the group and go to “properties“.
- Copy the “distinguishedName” property from the Attribute Editor tab
- E.g CN=pureauth,DC=pureauth,DC=local
Configure the Mapping Attributes
PureSYNC has certain defaults for which properties it will map to the required 6 properties. You can change these to other fields by substituting the name of the desired attribute from the Attribute Editor. Here are the defaults:
  fullName: displayName
  corporateEmail: userPrincipalName
  personalEmail: mail
  phoneNumber: telephoneNumber
  groups: memberof
  roles: employeeType
AutoSYNC
PureSYNC has an autosync mode where it will look for any changes in AD and automatically SYNC those changes with the PureAUTH server. It supports autosync functionality on any domain joined machine. PureSYNC does not support autosync functionality on Domain controllers. To enable autosync for AD, please follow the following steps.
- Go to C:\Program Files\PureSync\config and open puresync.config in a text editor.
- Under the “keys” section, ensure the private and public keys have full path to the keys, instead of a relative path. e.g.
- privateKey: E:\Shared\pureauth\org-private-key.pem (Full Path)
- Instead of
- privateKey: org-private-key.pem (Relative Path)
- If the keys have a relative path, please enter the full path of the keys.
- Open an Administrator command prompt which has domain admin privileges.
- Confirm that you have previously generated kdsrootkey for Managed accounts.
- If kdsrootkey is not present, use command add-kdsrootkey and wait 10 hours for the changes to take effect. Ref: Microsoft: Add kds Key.
- Warning: Not having KDS-rootkey will result in “Server Unwilling” errors.
- Run command:
puresync autosync install- If successful, please restart the machine.
- Re-open the Administrator command prompt and run command:
puresync autosync startCSV
Selecting the CSV source option lets us use a CSV file with specific columns as a source of user data for PureSYNC.
Provide the CSV file path. [users_datasets.csv]:Enter the full path to a CSV file. PureSYNC will create this file if it does not exist in the next step.
Do you want to download the CSV Template file? [Y/n]:If you have not downloaded the CSV template before, enter ‘Y’, else enter ‘n’. If you enter ‘Y’, PureSYNC will download the template file and write it at the Path given in the earlier step.
You can edit this CSV file and enter the data required. Following is the data required to be entered in the CSV:
- [Primary] Full Name
- [Primary] Personal Email
- [Primary] Corporate Email
- [Primary] Phone Number
You can keep the other columns as blank. We will clarify the usage of these columns in the roles and groups section.
Azure AD
To configure Azure AD as a datasource in PureSYNC, we need to register it in Azure AD Portal. Follow the steps given to register the application.
- Sign in to the Azure portal.
- If access to multiple tenants is available, use the Directories + subscriptions filter
 in the top menu to switch to the tenant in which to register the application.
 - Search for and select Azure Active Directory.
- Under Manage, select App registrations > New registration.
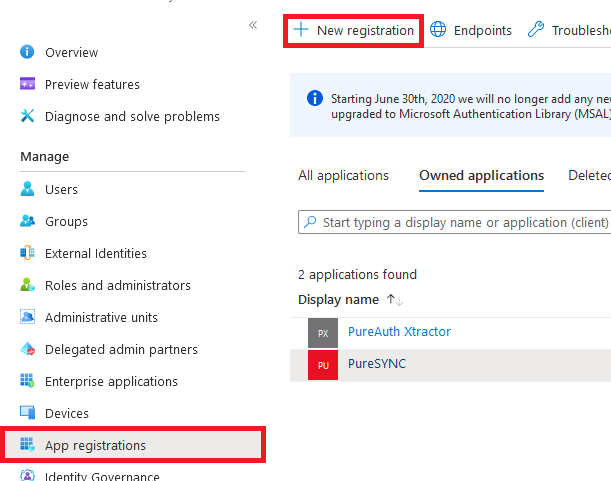
- For Name, enter a name for the application. For example, enter PureSync.
- Select Register to create the application.
- Under Manage, select Certificates & secrets.
- Under Client secrets, select New client secret, enter a name, and then select Add. Record the secret value in a safe location for use in a later step.
- Under Manage, select API Permissions > Add a permission. Select the following permissions.
- Group.Read.All
- GroupMember.Read.All
- User.Read
- User.Read.All
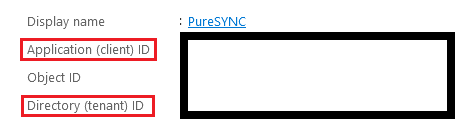
- Go to Overview, note the following fields for use in a future step:
- Directory (tenant) ID
- Application (client) ID
Once you have registered the application, enter the relevant fields in the command prompt once PureSYNC prompts for them.
Create a security group in azure
Create a security group in Azure for PureSYNC. The users in this group will be visible to PureSYNC. After creating the group, please note the group object ID.
Configure the Mapping Attributes
PureSYNC has certain defaults for which properties it will map to the required 6 properties. You can change these to other fields by substituting the name of the desired attribute from the Attribute Editor. Here are the defaults:
  fullName: displayName
  corporateEmail: userPrincipalName
  personalEmail: otherMails
  phoneNumber: mobilePhone
  groups: department
  roles: employeeType
AutoSYNC
PureSYNC has an autosync mode where it will look for any changes in AD and automatically SYNC those changes with the PureAUTH server. To setup autosync, please follow the steps given below.
- Open an Administrator command prompt (Local Admin)
- Run command:
puresync autosync installAfter the success of previous command, run:
puresync autosync startAdding Users to PureAUTH
To add the user on the PureAuth Platform, perform the following command.
puresync addAfter this step, users can create their profile by installing the AuthVR5 app on their phone. ref: Setup AuthVR5
Groups on PureAUTH
Groups on PureAUTH allow you to set which employees are allowed to access which applications. To set these authorizations, login to N4cer and navigate to Access > Groups.
By default, all applications and users are added to the Everyone group. To add a new group, click on the Add Group button on the top right.
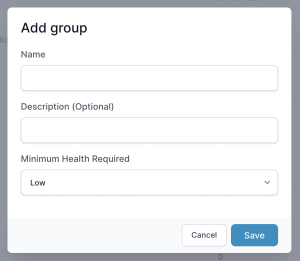
Enter the name of the group in lowercase and without spaces. e.g. admins. Click Save. Once you have created such groups, you need to assign applications to it. Users in this group will have access to these applications. To assign applications, refer to the following steps:
- Click on the newly created group name.
- Click on Assign Applications.
- In the popup, select the applications that you want to assign.
- Click done.
Important: Once you have assigned the applications to the group, remove the applications from the Everyone group. This will only allow the users from a particular group to access this application.
To assign users, we can use PureSYNC. Here are the commands for adding users to groups:
List all available groups
puresync group listManually add users to groups
Run the below command to add/update the groups for users. Do note that even if you are adding a single new group to the user, all of their groups must be mentioned. If all groups are not mentioned, they will be removed from the user.
puresync group attach <group_names (comma separated)> <employee_corporate_emails (comma separated)>
e.g. puresync group attach admins,developers,testers user@example.com
                           ------------------------- ----------------
                                 ^ Groups                 ^ Users
CSV
To add groups to users using the CSV source, add them in the groups column in CSV. They must be comma separated.

Run one of the following commands to update groups.
puresync add
puresync update
Active Directory
Depending on the Mapping Attribute set for groups, we need different approaches to update them.
If the mapping attribute of groups is groups: memberof, then do the following for assigning it to a user:
- Create a security group with the same group name as on N4cer. e.g. admins
- Add the users to be assigned to admins group to the security group.
If the mapping attribute is something else, enter comma separated attribute names in the mapped attribute in AD. e.g. in case of the mapping groups: department
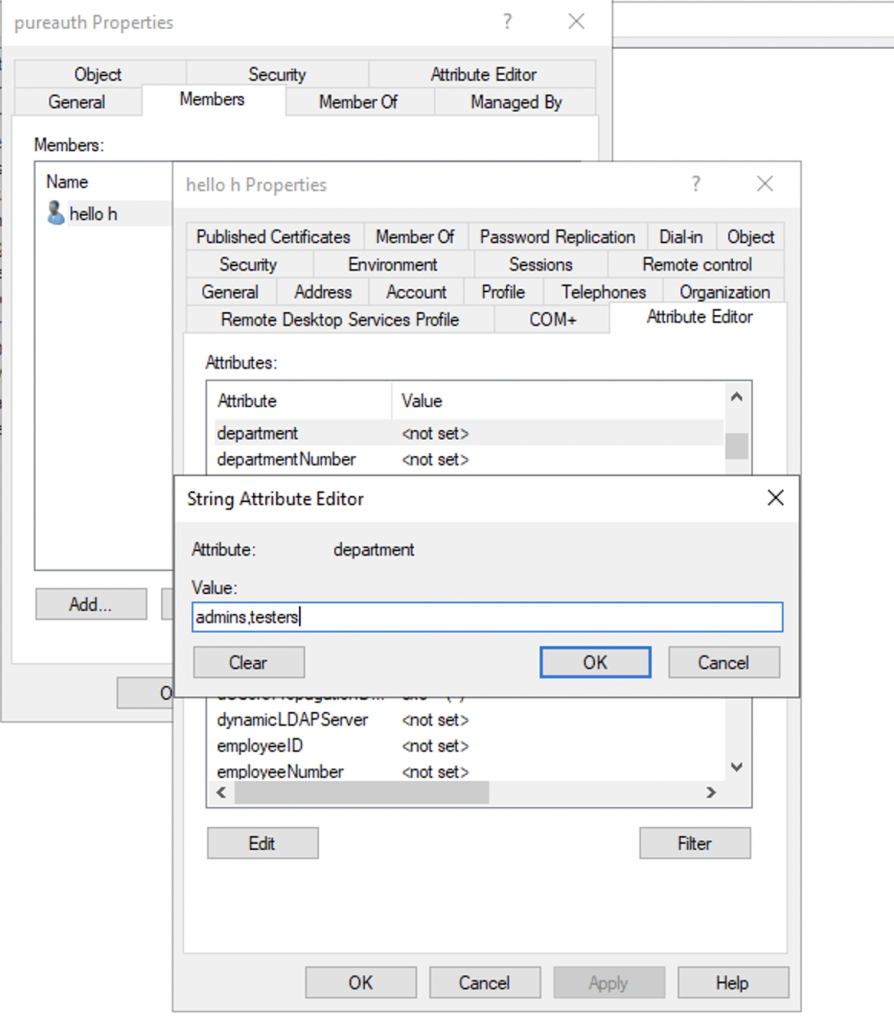
Run one of the following commands to update groups.
puresync add
puresync update
Azure AD
To assign groups to a user in Azure AD, add the names of the groups to be assigned to the mapped attribute in AD in a comma separated format. In case of mapping groups: department

Run one of the following commands to update the groups:
puresync add
puresync update
Updating Users on PureAUTH
- To update all the user profiles (from a specific data-source) on the PureAUTH Platform, run the following command.
puresync updateActivating and Deactivating a User on PureAUTH
- To activate all the user profiles (from a specific data-source) on the PureAUTH Platform, run the following command.
puresync activate- To activate a single user profile on the PureAUTH Platform, run the following command.
puresync activate <corporate email of user>- To deactivate all the user profiles (from a specific data-source) on the PureAUTH Platform, run the following command.
puresync deactivate- To deactivate a single user on the PureAUTH platform, run the following command.
puresync deactivate <corporate email of user>Get Status of User on PureAUTH
- To get the status of all the users (from a specific data-source) on the PureAUTH Platform, run the following command.
puresync statusLookup Corporate Emails from Identifier
PureSYNC can reverse an identifier from the N4cer portal (Audit logs) to give you the corresponding user email. Use the following command.
puresync lookup 1b051d3fb4d99f73f17d989833f4e0a1d2814026cf5d4b1a123b66d5da9fadcdResend Welcome Email to users
PureSYNC can resend welcome emails to all unverified users. Use the following command.
puresync email resendFor sending emails to specific user, (verified or unverified), use the following command.
puresync email resend <corporate_email>Further Assistance
For further information or assistance, please contact PureID support team : support@pureid.io.